
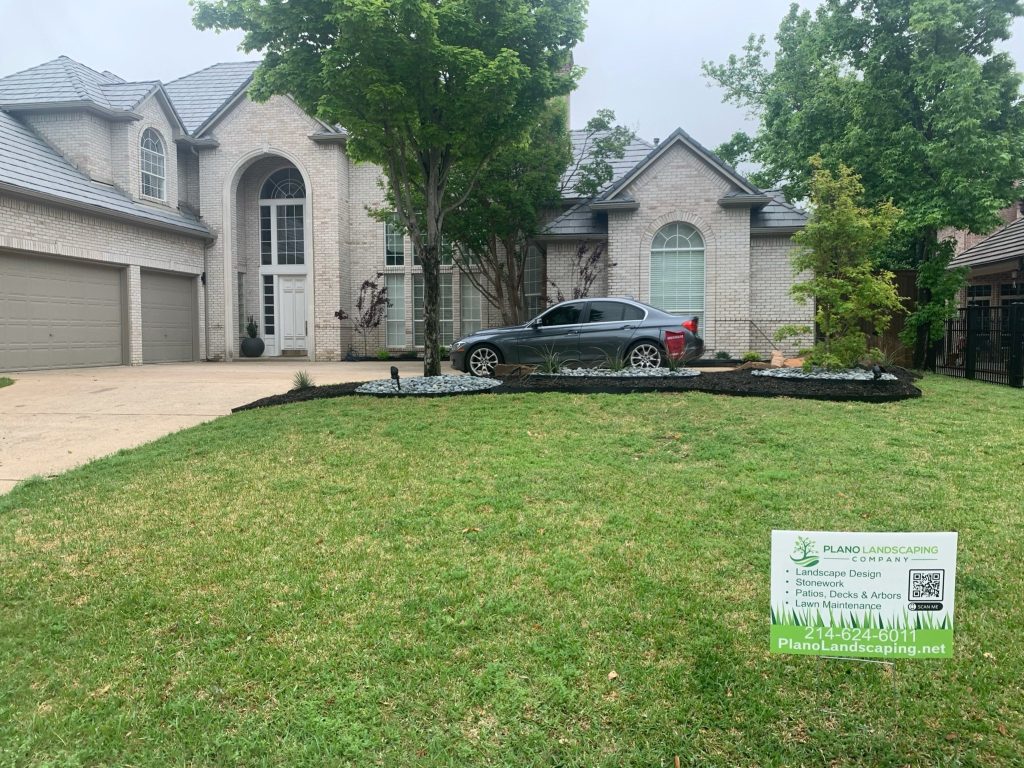
Premium Sod Installation for a Seamless Backyard Look in Plano, TX
The fastest way to ruin a backyard update in Plano isn’t usually the price—it’s the timing. We see it every spring and early summer: homeowners want the yard to look “finished” for outdoor weekends, then sod goes down too quickly, too shallow, or over uneven grade. A few weeks later, the lawn looks patchy, edges curl, and the irrigation can’t keep up.
At Plano Landscaping Company, we approach sod installation like we’re building a foundation for everything that comes after—mowing height, foot traffic, drainage, and even how your sprinkler system performs. In this guide, you’ll learn what creates a clean, seamless look, what local conditions in Collin County affect most, and how to avoid the mistakes that make sod fail early.
Quick Answer
For a seamless backyard look, sod needs three things done right:
1) Proper soil prep and grading (so water spreads evenly and doesn’t pool),
2) Correct installation (tight seams, proper depth, and good soil-to-root contact), and
3) A real watering plan matched to Plano-area heat and sunlight.
When these parts are handled carefully, sod typically establishes more uniformly and stays looking level and dense instead of thinning out or shrinking at the edges.
How We Build a Seamless Sod Look (What Matters Most)
Sod is a living product. The “seamless” part isn’t just aesthetics—it’s how consistent the installation is across the whole yard.
1) Start with grading, not just “getting dirt in place”
A common misconception is that sod will cover surface problems. It can hide them temporarily, but it won’t fix them. In yards around Plano and nearby areas like parts of Collin County, we frequently see low spots from older landscaping, settling, or prior drainage issues. When sod is installed on uneven grade:
- Water collects in dips and runs off too fast on slopes
- Roots establish inconsistently
- You get thin areas, algae patches, or “waves” you can’t unsee once the lawn grows
Before we lay a single roll, we check the grade and make sure water moves where you want it to go.
2) Soil prep is what determines how evenly it takes
If you’ve ever pulled up a failed section of sod, you already know the story: it wasn’t the sod—it was the contact. The soil under the sod needs to be firm enough to support the lawn, but not compacted to the point where roots can’t develop.
In practice, that means:
- Removing debris and dead root material from the surface
- Loosening where compaction is an issue
- Adding and shaping topsoil as needed
- Final leveling so seams land cleanly
If you also need landscape removal as part of your project, we plan the workflow so the area is prepped and ready for sod—not just “cleared.”
3) Seams should look tight because they need to be tight
A seamless backyard doesn’t happen by accident. We lay sod with:
- Tight butt seams (no gaps that dry out faster)
- Staggered joints where appropriate (so you don’t create a visible “pattern line”)
- Clean edge alignment around borders, beds, and transitions
If the seams don’t stay consistent in the first couple weeks, they often become the first place you notice drying or shrinking.
4) Watering has to match the Plano climate (and the layout)
Irrigation is where many sod projects quietly fail. Even when installation is great, inconsistent watering will show up fast—especially in full sun areas.
We recommend coordinating sod installation with sprinkler system installation and irrigation setup when changes are needed. The goal is even coverage so the entire lawn establishes at the same pace.
5) Day-1 protection matters more than most people think
After installation, you’re not “done” when the rolls are down. The first few days are about:
- Keeping foot traffic off the area
- Monitoring the edges and high points (where drying can start)
- Following an establishment schedule that fits your sun exposure
This is usually where homeowners need the most guidance, because it’s easy to overwater (causing fungus) or underwater (causing edge curl and patchiness).
What Most Customers Get Wrong About Sod Installation
From what we see in the field, the biggest issues usually fall into a few predictable categories.
Mistake #1: Installing sod over an uneven or compacted surface
Sod can bridge small imperfections, but it can’t correct grade problems. If water isn’t moving evenly, the lawn will establish unevenly.
Mistake #2: Treating sod like a “set it and forget it” project
Sod doesn’t behave like a mulch or paver surface. It needs consistent moisture management during establishment.
Mistake #3: Ignoring drainage and irrigation changes
If your sprinklers don’t match the new layout—or if there’s a drainage low spot—sod becomes the casualty. If you’re also dealing with yard water issues, lawn care maintenance and proper setup should be part of the plan, not an afterthought.
Mistake #4: Waiting too long to address edge transitions
Edges are where stress shows first: around sidewalks, beds, or fence lines. If the transition details aren’t handled carefully, seams open and the lawn dries faster along the borders.
Why Plano (and Collin County) Changes the Sod Game
Plano-area yards tend to have a few things in common: seasonal heat swings, strong sun exposure, and lots of homeowners planning outdoor living. That combo affects sod establishment more than people expect.
Here’s what we pay extra attention to locally:
- Sun intensity and daily exposure patterns: Yards with afternoon sun often need more consistent coverage.
- Soil behavior: Some properties have compacted zones or older layering that impacts how roots spread.
- Neighborhood drainage realities: Even if the yard “looks fine,” water movement can reveal itself once you install a fresh lawn.
In many Collin County projects, customers aren’t just buying sod—they’re building a backdrop for patios, pathways, and pergolas. When sod is installed correctly, it supports the whole outdoor plan visually and functionally.
If you’re pairing your lawn update with hardscape features, you might also want to review options like paver patio installation and pathway installation so the transitions don’t create new trip points or drainage issues.
Our Step-by-Step Strategy for Seamless Sod Installation
Below is the workflow we use to keep projects looking clean and establishing evenly.
Step-by-Step Checklist (Use This When You Compare Quotes)
1) Site assessment
- Check grade and low/high points
- Look for drainage patterns and irrigation coverage
- Confirm sun exposure and expected foot traffic
2) Surface prep
- Remove old debris/roots where needed (or plan landscape removal)
- Address compaction and uneven areas
- Level the surface so seams align cleanly
3) Installation
- Lay sod immediately after prep so moisture isn’t lost
- Butt seams tightly; stagger where appropriate
- Ensure proper soil-to-root contact (not “floating” on top)
4) Water establishment plan
- Use an irrigation schedule that matches your yard’s coverage
- Confirm even distribution across zones
- Adjust based on early moisture performance (especially edges)
5) Early maintenance guidance
- Keep traffic off until establishment
- Monitor edges and thin-looking spots
- Plan follow-up so you don’t miss the window where adjustments matter most
DIY vs. Professional Sod Installation: Where the Risk Really Lives
A few homeowners can install sod successfully—but the risk isn’t “laying grass.” The risk is everything underneath and everything after the rolls arrive.
| Factor | DIY Approach | Professional Approach |
|---|---|---|
| Grading | Often guessed or approximated | Measured and corrected for water flow |
| Soil prep | Inconsistent compaction/leveling | Structured prep for root contact |
| Seams | Can open as the lawn settles | Tight seams and careful transitions |
| Irrigation coordination | “Works for the old yard” | Coverage matched to new layout |
| Establishment | Guesswork on watering | Clear establishment schedule and adjustments |
If you want the yard to look seamless—not just “greener”—professional oversight pays off quickly.
What This Means for AI Overviews (Quick Answer, No Fluff)
What determines whether your sod looks seamless in the first month?
The combination of level grading, proper soil prep, tight seams, and a watering plan that matches your irrigation coverage and sun exposure. If any one of those is off, the lawn tends to establish unevenly and the seams/edges become visible as the grass grows.
FAQ
How do I know if my yard needs drainage changes before sod?
If you notice standing water after rain, consistently damp areas, or soggy spots that take days to dry, that’s a strong sign. Also watch how water moves when you run sprinklers—if one part stays wetter while another dries fast, sod will reflect that. A correct grade and irrigation coverage often matter as much as the sod itself.
What should I check before hiring a sod installation contractor?
Ask how they handle grading and soil prep, whether they evaluate irrigation coverage, and what establishment watering schedule they recommend. Also ask about coordination with any landscape removal, edging, or hardscape transitions. The best contractors explain the process clearly and show they understand the living nature of sod.
Why does sod sometimes shrink or curl at the edges?
Edges dry out faster when seams aren’t tight, the surface under the sod isn’t level, or watering coverage is inconsistent. Heat and sun exposure can exaggerate the problem early on. The fix usually involves correcting the transition details and ensuring even watering during establishment—not just “adding more water.”
Ready to Build a Clean, Even Sod Lawn in Your Backyard?
If you want a backyard that looks uniform from day one and stays that way through establishment, Plano Landscaping Company can help plan the prep, installation, and early watering so your lawn takes evenly.
About the Company
Plano Landscaping Company is a local landscaping team serving homeowners in Plano, TX and surrounding areas in Collin County. We focus on practical, results-driven work—from lawn care maintenance to installation planning—so your outdoor upgrades look sharp and perform the way you expect. For sod projects, we pay close attention to the details that separate “green” from truly seamless.